877-454-3672

Search Tours

Photography Hack — Erasing Tourists from Landscapes

Does having other tourists in your photos drive you nuts? Here is a simple hack to help you remove unwanted noise from future travel shoots …

angkor-wat-siem-reap-cambodia

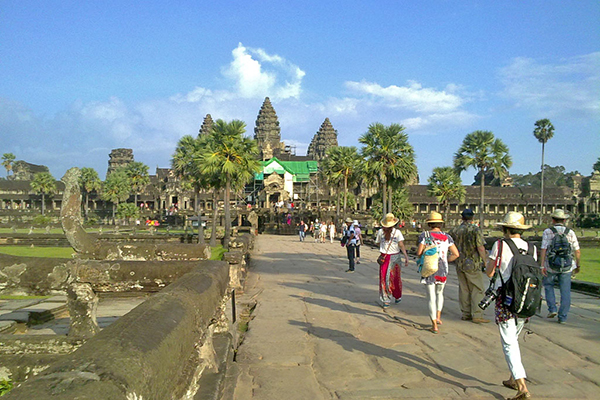
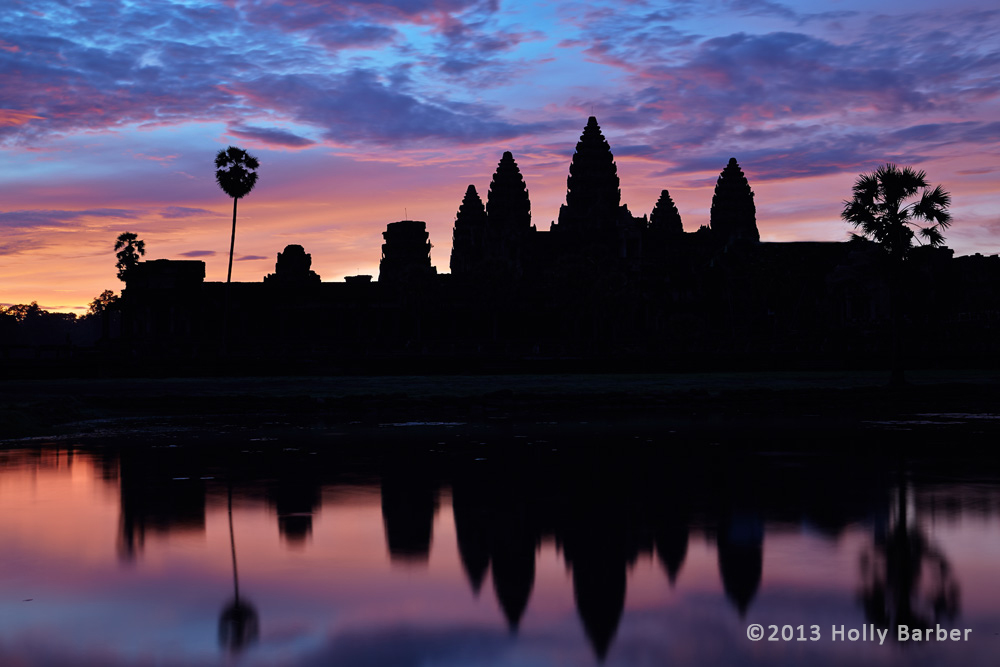
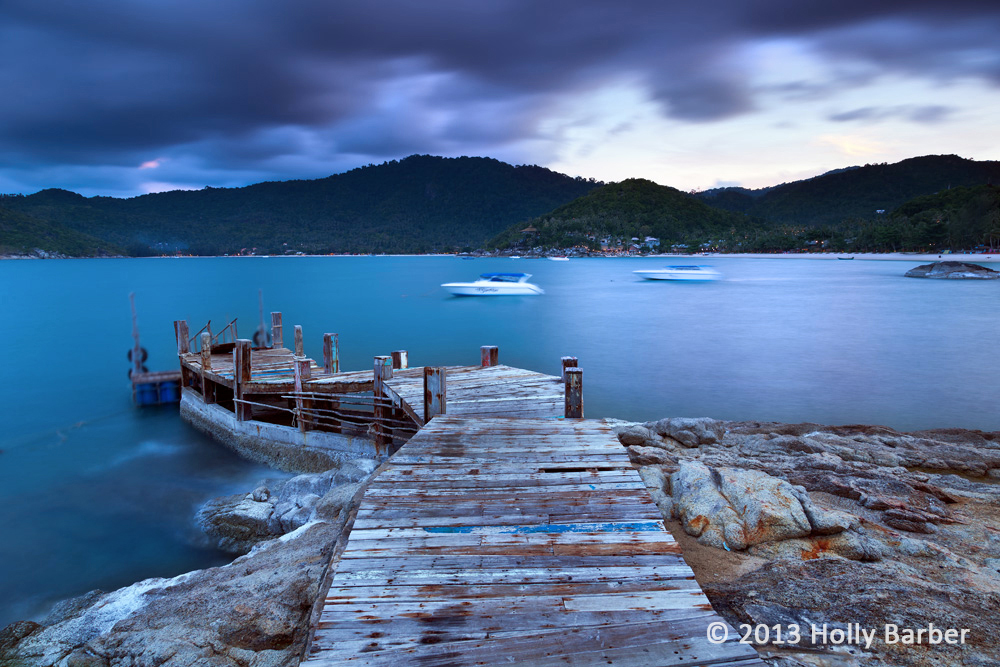
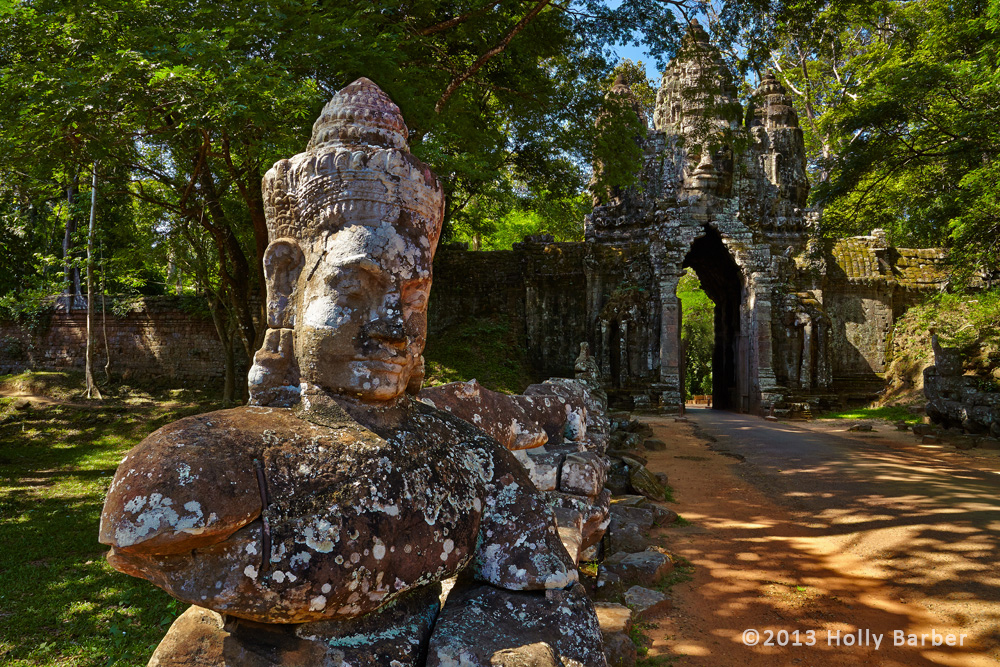
So you have flown around the world to visit a beautiful or long-sought after sight to find in bustling with other tourists. You try and wait out the other revelers looking to get the perfect shot, but alas a person-free photo proves impossible, like the one above. Well, with a little preparation and a little Photoshop magic, you can eliminate the crowd.

*This technique requires using your camera’s manual setting and post-production photoshopping, so be warned!

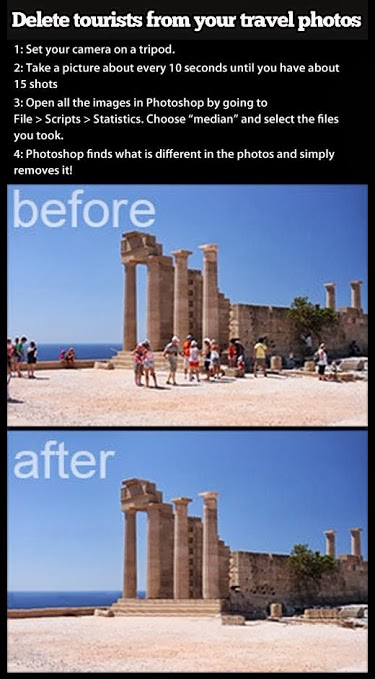
1. Use a tripod and set yourself up

Pick a low-traffic area where the fewest people are to be found.

2. Take between 15-30 pictures of the landscape

Snap the photos within a 15 minute window — you are trying to record  everything in the scene even if other people wander in and out of frame. People rarely linger even at the most popular views.  This will give Photoshop enough data to remove  generate a people-free shot composite.

3. Use Photoshop to make the statistical average of the photos

Once you’ve got the 30 or so pictures you’ll be using, you need to open up all of your images in Photoshop CS. Next, go to the file menu and pick scripts –> statistics. At this point, a dialog box will pop up, showing the different modes. You’ll want to select “Choose stacks” mode, and then, select “median” and exit. – See more at: http://www.digital-photo-secrets.com/tip/2530/amazing-photography-tricks-how-to-get-a-people-free-picture-at-a-tourist-trap/#sthash.onmB9Uc5.dpuf

Open all of your images in Photoshop CS. Go to File menu and pick scripts => statistic. A dialogue box will pop up, select Choose Stacks mode and then select Median.

You just asked Photoshop to average out the data in the pictures that you took. The landscape doesn’t  change picture to picture so it will remain constant while the moving people won’t be averaged in.

average photo

Once you’ve got the 30 or so pictures you’ll be using, you need to open up all of your images in Photoshop CS. Next, go to the file menu and pick scripts –> statistics. At this point, a dialog box will pop up, showing the different modes. You’ll want to select “Choose stacks” mode, and then, select “median” and exit. – See more at: http://www.digital-photo-secrets.com/tip/2530/amazing-photography-tricks-how-to-get-a-people-free-picture-at-a-tourist-trap/#sthash.onmB9Uc5.dpuf

Tips!

  • Manual mode is key. Your exposure should be consistent so that all your photos have the same brightness.
  • Keep an eye on the clouds. Normally they are slow moving enough for this technique to work but on stormier days averaging the photos may give you a blurry sky.

1.) Setup your camera and tripod on location. Pick a low traffic area where you’re likely to get images with the smallest amount of people possible.

2.) Take between 15 and 30 photos of the landscape you want, within a time interval of about fifteen minutes. By doing this, you’re giving Photoshop a bunch of data it can use to come up with a people-free shot.

3.) Use photoshop to take the statistical average of the pictures, a result that is always “people free.” Not even tourists stay in the same place for much time. The average section of the photo shouldn’t have any people in it, especially if you’ve taken a lot of pictures.

– See more at: http://www.digital-photo-secrets.com/tip/2530/amazing-photography-tricks-how-to-get-a-people-free-picture-at-a-tourist-trap/#sthash.5v6TIPLm.dpuf

1.) Setup your camera and tripod on location. Pick a low traffic area where you’re likely to get images with the smallest amount of people possible. – See more at: http://www.digital-photo-secrets.com/tip/2530/amazing-photography-tricks-how-to-get-a-people-free-picture-at-a-tourist-trap/#sthash.5v6TIPLm.dpuf
How many times have you run into the following situation? You’ve flown across the world to visit some beautiful location, but once you get there, it’s packed full of tourists. You try to wait for the perfect opportunity to take a person-free photo, but it just doesn’t happen. Isn’t that always the way it is with beautiful places? Everyone wants to see them, so they’re always packed. Well, with this amazing photography trick, you can get a people free picture in some of the most crowded tourist traps you’ll ever visit. Here’s how. – See more at: http://www.digital-photo-secrets.com/tip/2530/amazing-photography-tricks-how-to-get-a-people-free-picture-at-a-tourist-trap/#sthash.5v6TIPLm.dpuf

1.) Setup your camera and tripod on location. Pick a low traffic area where you’re likely to get images with the smallest amount of people possible.

2.) Take between 15 and 30 photos of the landscape you want, within a time interval of about fifteen minutes. By doing this, you’re giving Photoshop a bunch of data it can use to come up with a people-free shot.

3.) Use photoshop to take the statistical average of the pictures, a result that is always “people free.” Not even tourists stay in the same place for much time. The average section of the photo shouldn’t have any people in it, especially if you’ve taken a lot of pictures.

– See more at: http://www.digital-photo-secrets.com/tip/2530/amazing-photography-tricks-how-to-get-a-people-free-picture-at-a-tourist-trap/#sthash.5v6TIPLm.dpuf

Read more »

Travel photography — Oh, the people you’ll meet

Whether you are looking for close up profiles, shots of people in their environments or beautiful reminders of those who cross your path along the way, here are our Top 8 tips on how to make the most of capturing the faces while you travel  …

vietnam 380

Profile shots of the people you come across on your are a great way to distinguish your photos from the average vacation portfolio. Unless you have a telephoto lends, this is going to mean having to get up close and personal with your subjects. Here are our top 8 tips to getting the job done.

Plan ahead

Research where you are going and have an idea of the pictures you are looking to capture. Plan for extra time in those places you think you will meet interesting subjects — securing a good portrait means gaining a subject’s trust and that can take a little longer.

Use a guide

When planning a trip, make it known that you are a shutter bug. A good guide will take your photography need into account when executing your tour. If you are going to a place where you don’t know the language, a guide can be an invaluable resource to getting up close and personal with local residents by translating warm greetings and making you feel like part of the local environment.

Normally I am much to shy for photographs, but this photographer wore me down over lunch on Don Det in Laos so I let him snap my attempt to hang off the plank.
Normally I am much to shy for photographs, but a photographer named Adrien wore me down over lunch on Don Det in Laos. As a result I let him snap my attempt to hang off the plank over the Mekong.

Put down the camera

It is much easier to get a subject to open up if you approach them with the camera down. Spend some time socializing with the people you plan to photograph and they will be more comfortable in your presence and in the presence of your camera. You will also have a much better chance of catching them in a natural pose and settings when it comes time to snap your shots.

Learn a few local words

Whether abroad or at home it isn’t uncommon for a person to be uncomfortable in front of the camera. Putting your subject at ease is key to getting a relaxed and natural photo. If there is a language barrier, knowing how to compliment your subject will help make them feel comfortable and in turn, help you get the shot you are looking for. Added bonus if your accent or pronunciation makes them laugh —  nothing breaks down barriers like a good giggle.

Be culturally sensitive

There isn’t a more iconic image from Southeast Asia than saffron-clad monks, but how do you get that picture without disrespecting the culture you are trying to capture? Morning alms are great photo opportunities but make sure you know the ritual before showing up camera blazing. This is where a guide can come in handy! Always ask permission when shooting children or in someone’s home village — body language can be pretty clear if you can’t translate the request. Try and put yourself in their shoes — you wouldn’t want that great picture to be at the expense of your subject’s dignity.

After showing an interest in my camera, I let this boy snap pictures of me with a nearby water buffalo. Afterwards, he let me snap this gem -- only after his mom gave me the thumbs up.
After showing an interest in my camera, I let this boy snap pictures of me with a nearby water buffalo. Afterwards, he let me snap this gem — only after his mom gave me the thumbs up.

Buy something

If you are taking pictures at the market or of a traditional handicraft process, consider making a small purchase. It will ingratiate you to the vendor, allowing for better pictures, and it will also make you feel more comfortable staying put for as long as it takes to get your shot. In many busy markets, tourists taking pictures are common-place and seen as an annoyance. Separate yourself from the pack and you are sure to elicit a fresh reaction from the vendor.

Take an interest

Similar to purchasing something, taking an interest in the activity you are looking to photograph can help the subject feel less in the spot light. Offer to lend a hand, take part or ask plenty of questions to make your interest obvious and to make your subject feel respected rather than on display.

Step out of your comfort zone

While on the road, keep your eyes open for opportunities to go beyond what you had expected. We have had guests accept invitations from guides to attend a local wedding or ceremonies. There events are WIDELY photographed (Asia is the epicenter for the “selfie”) so you will be in good company with your camera. These photos are also bound to capture one of the most memorable experiences of your trip!

 … Read more »

Fun with camera settings

With today’s modern cameras, the sheer complexity of the available settings can seem overwhelming. In this blog I will attempt to explain three of the most important settings and how adjusting them can improve your travel photos…

6. camera_settings

ISO

ISO is the measure of sensitivity to light for camera sensors and film. The higher the ISO the more sensitive to light a camera’s sensor (or film’s emulsion if you haven’t transitioned to digital) becomes. Adjusting the camera’s ISO can be a very useful thing in low light situations, although there is a price to pay for this increased sensitivity in the form of grainer and less detailed images. The performance of modern cameras at high ISO setting is getting better year by year but as a rule it is still preferable to use the lowest ISO possible in any given situation. Once you have selected the aperture you require for your image set your ISO to the lowest setting that still allows for the shutter speed necessary to get the shot.

White Balance

Our eyes and brain are incredibly sophisticated — we always see a white object as true white whatever the lighting conditions, but in fact light has a ‘temperature’ which can produce a colour cast in photographs.  The colour temperature of light is essentially how cool or warm it looks. The light from a candle or old fashioned tungsten light bulb is warm, while the light from the sky on a very overcast day is cool.

While most cameras’ Auto White Balance (AWB) setting generally does a fine job, there are instances when a colour cast may be desirable, or when the camera struggles to interpret a neutral colour temperature. Let’s say, for example, that you have set your alarm for 5am in order to get out there and capture that wonderful ‘Golden Hour’ warm morning light. The last thing you want is for your camera’s AWB setting to cool it down by trying to neutralize the colour temperature, losing the feel of the sunrise. For most outside situations the ‘daylight’ white balance setting will give you the most natural and accurate results. In most other situations AWB is the best to go for.

In the image of Angkor Wat above the ‘daylight’ white balance option was selected to capture the sunrise colours in the sky accurately and to stop the camera from making unwanted adjustments.

Metering

Modern cameras have clever light metering systems that can assess the scene in front of you and generally produce well exposed images. Most cameras have at least 3 metering systems and understanding how they work (and when they fail) will help you produce better exposed photos.

In order to achieve a correct exposure it’s useful to know that your camera is trying to produce a mid-tone grey average for any given scene. In a scene with light and dark areas fairly evenly spread, a camera can cope fairly well using its default ‘evaluative’ (Canon) or ‘matrix’ (Nikon) metering system. The camera’s meter will struggle however when the entire scene is either very light (think snowscapes) or very dark (night time).  If you ever find yourself trying to take a picture of a white owl against a field of snow, you will probably find that the camera produces an under-exposed image, the reason being that the camera is trying to average all that white to a mid grey. Although rather counter-intuitive, in this situation it’s necessary to manually over expose your image either using ‘manual’ mode on your camera or the ‘exposure compensation’ option.  The inverse will apply in a very dark scene.

In situations where the lighting around the focus of the photo and the rest of the frame are vastly different (for example a person in bright light at the end of a dark tunnel) the camera will tend to overexpose the picture and all of the detail in the bright area will be lost. This is where ‘partial’ and ‘spot’ metering modes come into play. Both these systems meter only a percentage of the scene (a 10% and 3% circle in the center of the viewfinder respectively), making them more accurate and incredibly useful when a very small area in a picture needs to be metered correctly.

 … Read more »

Fun with Shutter Speeds

Whether you want to blur or capture objects in motion, adjusting your camera’s shutter speed is the key. Here Holly explains how to bring your photos to life …

4. shutter_speed

The world is in motion; more often than not there’s something moving, flowing or flapping! Expressing that motion brings pictures alive; transforming them from a static record to a dynamic image. There are certain classic subjects that automatically spring to mind when thinking of captured motion in images: smooth, milky water flowing over the falls, blurred people milling around a train station or star trails in the night sky. In each example, a part of the image is blurred by the motion of the subject — the water, people or stars – while the stationary parts of the picture remain sharp.

In order to capture the desired image using a slow shutter speed, a low ISO of 100 (or lower if your camera will allow it), should be selected. In fact, it is best practice to use as low an ISO as lighting allows to ensure cleaner pictures with less noise.

Setting your camera mode dial to Shutter Priority (either Tv or S depending on your brand of camera) will allow you to choose your shutter speed and ISO while allowing the camera’s metering system to automatically set the correct aperture for proper exposure.

The precise shutter speed needed will depend on how fast the subject to be blurred is moving — the slower the object you are looking to blur, the slower the shutter speed will need to be. For example, to blur a person moving at a walking pace a shutter speed of approximately ¼ of a second is needed, whereas blurring clouds in the sky can require as much as a minute.

You only have to look at the work of some of the great modern landscape photographers, such as David Noton, or Joe Cornish to see the beauty that can be captured with a slow shutter speed, but there is a price to pay – camera shake!

Accepted wisdom dictates that the lowest shutter speed at which a camera can be hand held without the images suffering from the unwanted fuzziness of camera shake is the inverse of the focal length of the lens. In other words, if your lens is set to a focal length of 50mm then camera shake will occur at shutter speeds slower than 1/50 second; if you are zooming in to 200mm then that speed increases to 1/200 second.

As previously mentioned, blurring the moving elements of an image only works when the static parts of that image retain their sharpness. The image above, taken on the Thai island of Koh Phangan was shot using a shutter speed of 30 seconds. All moving elements: the sea, boats and clouds are blurred whereas the jetty, foreground rocks and distant hills are sharp.

Luckily, for those looking to experiment with slow shutter speeds, a tripod will eliminate any and all camera shake leaving the stationary parts of your images crisp and clear.

Of course, sometimes we want to achieve the opposite effect and to freeze motion – for example capturing every droplet of water in a fountain or a bird in flight. To do this simply select a fast shutter speed – around 1/500 second for water and 1/1000 second for fast moving objects like cars or animals.  In low light conditions you will need to increase the camera’s light sensor by increasing the ISO, but be aware that this will lead to deterioration in the quality of the image. (High ISO settings are used when the photographer wants to hand hold cameras in low light situations.)

So if you are thinking of taking your travel photography to the next level and plan to experiment with longer shutter speeds why not pack a tripod in your luggage next time you hit the road?

Shutter Speed Guidelines

The best method of determining what works for the subject in question and for your own desired results is simply to experiment, but the shutter speeds given here will provide some rough guidelines.

To blur motion:

Blurring fast moving water (e.g. a river or waterfall)

1/8 second

People walking

1/4 – 1/2 second

Waves in the sea while retaining some detail

1 second

Water in the sea to create a smooth effect

15 – 30 seconds*

Moving clouds in the sky

8 seconds – 1 minute*

Creating traffic trails at night

20 seconds

Distinct star trails

10 minutes

* Extremely bright condition require additional filters to avoid overexposure. More will be covered on that topic in a later blog.

To freeze motion:

Running people or bicycles

1/250 second

Droplets of water in a fountain or waterfall

1/500 second

Fast moving cars, motorbikes or animals

1/1000 second

Read more »

Aperture — what’s the focal point?

Want to take your photography skills up a notch? Here Holly explains the basic principals to help get you out of auto mode …

3. aperture

There are many advantages to using a Single Lens Reflex (SLR) camera over the basic point-and-shoot variety; the versatility of being able to change the lens, shooting in RAW format and a larger sensor are among the benefits of using an SLR. One of the most fundamental advantages of investing in a camera with real lenses is having control over shutter speed and aperture settings which control each picture’s exposure to light.

The word ‘Photograph’ literally means ‘writing with light’. Light enters the camera through the lens and lands on a photo sensitive surface (traditionally film but these days more commonly a digital camera’s sensor) thus creating an image. There is a very specific amount of light that is required to create a properly exposed photo; too much and the picture is too bright or ‘over-exposed’, not enough and it’s too dark or ‘under-exposed’.  A user can control just how much light enters the camera to create different photographic effects.

There are two ways to control the amount of light entering the camera: the shutter speed and the aperture size.

The camera’s shutter is the device that opens and closes over a measured period of time to allow light to enter the camera through a hole in the lens, known as the aperture.

Fast shutter speeds mean that less light that is let into the camera, while leaving the shutters open for longer periods allows more light to be absorbed. By manipulating the relationship between the shutter speed and aperture settings one can create interesting photographic effects, while still controlling the amount of light entering the camera to ensure correct exposure.

illustration-how-aperture-works-1

Getting creative with aperture at a set shutter speed

Aperture values are commonly referred to as the f-stops. Confusingly the aperture value increases as the actual hole gets smaller; for example an aperture of f/2.8 is very wide, while f/22 is tiny. The aperture value selected has a profound effect on the depth of field of an image, or the distance in front of and behind the photos focal point that appears sharp. One way to practice using this feature is to use your camera’s Aperture Priority setting — Av or A on your mode dial.

A shallow depth of field is generated by using a wide aperture (small f-stop number) and this creates the very pleasing effect of separating a pin-sharp subject from a beautifully blurred background – think of a portrait with a sharp face and an out-of-focus background. The larger the aperture (the smaller the f-stop number) the more blurred the background. With your camera set to Aperture Priority and a large aperture (small f-stop number) dialed in, your camera will automatically pick the appropriate (probably fast) shutter speed needed to guarantee a correct exposure in the given lighting conditions.

Now while a shallow depth of field works very well for certain subjects (portraits or wildlife shots especially) there are many situations when a wider depth of field is required; where the photographer desires objects both very near to and very far from the lens to be sharp.

The exact aperture required to do this depends on something called the ‘Hyperfocal Distance’.  This is the point of focus that allows for maximum depth of field.

In the image of Angkor Thom North Gate above the statue’s head was only around 2 feet from the camera, so a very a small aperture (large f-stop number) was needed to keep both the head and the gate in the background in pin sharp focus.

So how exactly does one determine the actual aperture value needed? Well, charts for this type of thing exist, but who wants to carry those around and look like a super geek? My advice would be – just guess! The luxury of this digital age is that photographers are able to instantly review and check pictures,  so the best option is probably trial and error, at least until you develop a feel for aperture settings.

Every lens has an aperture sweet spot, the f-stop at which the least diffraction occurs (an unwanted effect which makes images appear soft). This varies from lens to lens but is generally between f/8 and f/11 so ideally you need to use an aperture as close to this midrange point as possible while still achieving the desired effect.

Sound complicated? Well photography is mostly about artistic creativity, so set your camera to Aperture Priority and get out there and experiment!

 … Read more »